Vegetarian Chili with Black Beans and Corn

Hubs is a meat and potato man but I like to sneak in some vegetarian meals every week because I think they are healthier. I’m making this delicious vegetarian chili with black beans and corn today, using seasonal, organic produce I picked up at our local farm market. The combination of beans and corn makes a complete protein which is important if you are following a vegetarian diet.

Ingredients:
2 Tablespoons Watkins grapeseed oil, original unflavored, garlic and parsley or citrus and cilantro
2 organic red bell peppers, diced
1 onion, diced
4 cloves of garlic, mined or pressed or 2 teaspoons Watkins organic garlic granules
2 teaspoons Watkins organic chili powder
2 cups organic tomatoes, peeled or 2 cups canned tomatoes
1 can black beans, drained and rinsed
2 cups organic corn kernels, fresh or frozen
1/2 teaspoon Watkins sea salt, or to taste
1 teaspoons Watkins organic black pepper, or to taste

Garnish with: Continue reading Vegetarian Chili with Black Beans and Corn

How To Sterilize Canning Jars

If you are making homemade jams, jellies or pickles you’ll need to sterilize your jars before you fill them with your preserves. To sterilize jars, place them in a large pot or canner, cover them with hot water, bring water to a boil and leave jars in boiling water for 10 minutes. Then, place jars upside down on a clean towel or rack to drain.

If you are sealing your preserves you’ll need to sterilize the lids as well. Follow the manufacturer’s directions for sterilizing these, they are usually placed in boiling water as well.

I also sterilize my utensils as well; this includes the ladle, spoon and funnel for filling jars and the tongs or magnetic wand used for picking up hot lids and jars out of the water.

Although this is no longer recommended, jars may also be sterilized in the oven. I prefer this method for jams and jellies as it ensures the jars are dry, so there is no added moisture. However please note, I sterilize everything in boiling water first so I’m basically just keeping the jars hot and sterile. I highly recommend that you do the same.

So, after you remove your jars from the boiling water… Place the jars in the oven, I put them on a clean cookie sheet, turn the heat to 200 deg. F, once the oven has reached temperature, heat jars for 10 minutes. Then, turn off the oven leaving the jars inside until ready to fill.

Fruit Coffee Cake With Cinnamon Topping

This fruit coffee cake is low fat and not too sweet, if you want to reduce the sugar more use unsweetened apricots, peaches, or applesauce and use only 1/4 cup of sugar in the topping. You can use any kind of fruit you have on hand, I’ve made this recipe with frozen raspberries or blueberries as well. Watkins cinnamon

Ingredients:
2 tablespoons butter
4 tablespoons sugar
1 egg or 2 egg whites
1 2/3 cups flour (sifted)
3 teaspoons Watkins Baking Powder
1/4 teaspoon salt
1/2 cup milk
1 teaspoon Watkins Vanilla
1 cup sweetened cooked apricots, peaches, diced or applesauce
1/4 teaspoon Watkins lemon Extract

Directions: Continue reading Fruit Coffee Cake With Cinnamon Topping

How To Cook Salmon

We had a lovely salmon dinner last night, my Mother always called it brain food and she was pretty close. It’s a good source of protein that’s low in saturated fat and cholesterol and it contains healthy omega-3 fatty acids. Here’s how to cook salmon.

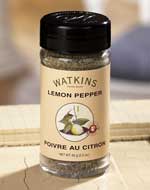
Watkins Lemon PepperThe easiest method of cooking salmon is to simply season it with a little lemon pepper or fish and seafood seasoning; pan fry the steaks or fillets at medium-high heat in a little grapeseed oil. Cook for about 5 minutes per side or until the flesh has changed a lighter color and no longer looks opaque. The flesh is very delicate so take care when turning the pieces so the fish doesn’t break or fall apart.

As a general rule for each inch (2.5 cm) thickness it takes 10 minutes to cook fresh salmon, you’ll need to allow 12-15 minutes per inch if it’s partially thawed and 20 minutes per inch if the fish is frozen. You’ll need to add 5 minutes to total cooking time if salmon is wrapped in foil (see below).

How to Cook a Whole Salmon Continue reading How To Cook Salmon

Watkins Spices and Rack

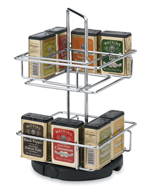
Watkins Spice RackWatkins spices and spice rack are sure to compliment nearly any kitchen decor. The custom chrome plated wire rack holds 16 decorative, vintage look tins filled with your favorite Watkins organic herbs and spices, which are sold separately.

The compact, easy to clean design fits neatly inside your cupboard or on your counter top. You’ll find the convenient turn table base spins easily and the handle makes it a dream to move around your work space.

Your choice of USDA certified organic herbs, spices and seasonings includes:

  • Organic Basil, 2 oz. tin (00503)
  • Organic Black Pepper, 4 oz. tin (00590)
  • Organic Chili Powder, 2 oz. tin (00591)
  • Organic Cinnamon, 2 oz. tin (00598)
  • Organic Cumin, 2 oz. tin (00592)
  • Organic Curry Powder, 2 oz. tin (00505)
  • Organic Dill, 2 oz. tin (00509)
  • Organic Dry Mustard, 2 oz. tin (00596)
  • Organic Garlic Powder, 2 oz. tin (00500)
  • Organic Ginger, 2 oz. tin (00595)
  • Organic Ground Cloves, 2 oz. tin (00507)
  • Organic Nutmeg, 2 oz. tin (00589)
  • Organic Onion Powder, 2 oz. tin (00501)
  • Organic Oregano, 2 oz. tin (00594)
  • Organic Paprika, 2 oz. tin (00593)
  • Organic Parsley (00508)
  • Organic Rosemary, 2 oz. tin (00504)
  • Organic Sage, 2 oz. tin (00506)
  • Organic Thyme, 2 oz. tin (00502)
  • Organic Chicken Seasoning, 2 oz. tin (00511)
  • Organic Beef Seasoning, 2 oz. tin (00510)

The Spice Rack (00515) filled with herbs and spices will make the perfect gift for a new bride, house warming, Christmas, birthday, graduation or for yourself! You’ll find them all in the US catalog or the Canadian catalog.

How To Cook Corn On The Cob

It’s corn season so I thought it would be a good time to share with you how to cook corn on the cob. There are several ways you can cook corn but we’ll start with the easiest.

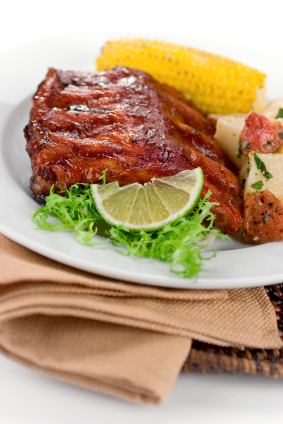
BBQ Ribs And Corn On The Cob

First husk the corn, this is simply peeling off the leaves and corn silk that cover the vegetable.

Place the corn on the cob in a large pot along with 2-3 inches of water. Cover and bring to a boil, turn down the heat to low and cook for 5 minutes or until the kernels have changed color, they’ll turn a darker yellow. Pretty easy right?

If you are having a barbecue you can cook your corn right on the grill. Place the husked cobs on a medium hot grill, then turn cobs every 5 minutes until it done on all sides. Some people say to soak the corn in water for half an hour before you grill it but I’ve never bothered. You can wrap the corn with a dab of butter in tin foil and grill it as above.

Serve your corn on the cob with butter, flavored butter, regular or butter salt and black pepper!

The secret to great corn on the cob is to cook freshly picked corn, the husks and silk should be green, not dry. The kernels should be plump and milky went pierced with your finger nail.

Kitchen Safety

Cooking can be a relaxing and enjoyable pastime. Unfortunately, the kitchen is also the most common room in the home where accidents occur. These kitchen safety tips will help keep you and others safe while you’re cooking and eating.

Hot pots and appliances, boiling water, splattering grease and oil, sharp knives; all these things are common in a kitchen. They can also be the things that make working in a kitchen a dangerous place. Keeping your kitchen clean to avoid contaminating the food is also important.
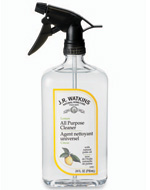
Watkins Lemon All Purpose CleanerFirst of all, make sure that your kitchen is clean from top to bottom, inside and out, this will prevent cross-contamination of dirt, bacteria and germs.

  • Get in the habit of washing your hands before handling foods and after handling raw meat.
  • Keep raw meat in a separate area of your refrigerator. Keep it tightly wrapped or place it in a leak proof container so juices can’t contaminate other foods.
  • Wash the counter top or cutting board with hot, soapy water after you’ve finished handling raw meat.
  • It’s best to use separate cutting boards, one for raw meats and another for vegetables. Tip: color code your cutting boards or use a plastic one for meat and a wooden one for other foods, this way you won’t forget which to use.

Meats should be cooked to recommended internal temperatures as determined by the United States Dietary Association:

  • Steaks and Roasts – 145 degrees F
  • Egg dishes – 160 degrees F
  • Fish – 145 degrees F
  • Chicken breasts – 165 degrees F
  • Pork – 160 degrees F
  • Whole poultry – 165 degrees F
  • Ground beef – 160 degrees F

To keep food fresh longer, keep your refrigerator temperature set below 41 degrees F and your freezer should be kept at 0 degrees F. Date each item before it is placed in your freezer so that you can use it before it gets too old.

Thaw frozen foods in the refrigerator overnight, in the microwave oven, or submerged in a bowl of cold water. Place the package in a watertight plastic bag, submerge in cold water, then change the water every 30 minutes until item is thawed. Don’t just leave the meat on the counter or in the sink to thaw as bacteria in the food can multiply and cause someone to get sick.

Preventing burns:

  • Teach your child which items might be hot and not to touch them with out your permission.
  • Invest in good quality, heat resistant pot holders and oven mitts. Don’t use a tea towel or dish cloth for this purpose, especially damp ones as the moisture can create a steam burn.
  • Keep pot handles turned so they are over the stove or counter top so someone walking by can’t accidentally knock them and their hot contents over.
  • Cover pans that contain hot grease or oil with a lid or splatter screen.

Knife safety:

  • Keep your knives sharp, believe it or not cuts happen less often and are less damaging with sharp knives.
  • Always cut away from yourself, never toward yourself.
  • Always use a cutting board, don’t place the food in your hand to cut it.
  • Don’t leave knives in the sink, especially in dish water where they can’t be seen.
  • Store knives point down in a butcher’s block or in some other special holder. This keeps them sharp longer and prevents cuts.

Last but not least, if you sample food as you cook use a clean spoon or fork each time. Taste testing just once can transfer germs from your mouth to the food.

Cooking can be hazardous, but it certainly doesn’t have to be. Simply follow the precautions mentioned above, then you will be cooking with confidence and the knowledge that you’re doing it in a safe, healthy manner.


How To Cook A Pot Roast

Learning how to cook a pot roast is something even a beginner can do. You’ll find this roast beef with vegetables is an easy to prepare, economical one pot dinner and it’s great to have for leftovers too. I always cook extra so we can enjoy it for several meals and have enough for sandwiches too. It’s much healthier than cold cuts as it low in sodium and fat.

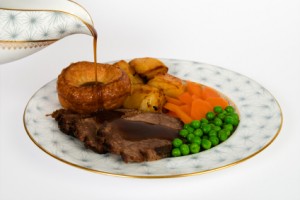
Roast Beef Dinner Preheat a large cast iron or heavy bottomed fry pan or dutch oven on medium-high heat. Add a tablespoon or two of cooking oil like Watkins grapeseed oil. Sprinkle the pot roast liberally with onion and garlic granules and black pepper to taste. Brown the seasoned roast on all sides in the preheated pan, remove roast and place in roasting pan, or set aside on a plate if you are using a dutch oven. De-glaze frying pan (or dutch oven) by adding about a cup or water and 1-2 teaspoons of Watkins beef soup and gravy base, stir and scrape pan while heating to a boil. Return roast to dutch oven or pour pan juices over roast in the roaster. Cover and place in a 350 deg F oven for 2 – 3 hours. About an hour before the roast is done, add some peeled carrots and potatoes cut into large chunks, you can also add some onions, garlic or parsnips too if you like. Cover and place back in the oven. Now, sit back, relax, and enjoy the wonderful smell of your dinner as it’s cooking. When the vegetables are tender, remove roast and vegetables from the broth that formed. Make gravy by thickening the broth with about 1/4 cup flour, taste and add some salt & pepper if needed. Serve slices of pot roast with vegetables and gravy poured on top of all.

How To Cook Pot Roast In A Slow Cooker Continue reading How To Cook A Pot Roast

How To Cook Beets

I love beets, they are good for you as they contain lots of fiber and are rich in folic acid, calcium, and iron. The good news is, beets are really easy to cook, here’s how!

Prepare beets by cutting off the tops leaving a half inch of the stem, wash well but do not scrub, take care not to cut or damage the skin before cooking as the color will leach out. Place whole beets in a pot, cover with water, bring to a boil, reduce heat to simmer and cook until done. The time will vary depending on the size of your beets. After 15-20 minutes you can test small beets for tenderness by piercing one with a knife, larger beets will take longer. When beets are tender, drain and cover with cold water until they are cool enough to handle. Gently rub each beet with your fingers, the skin will slip right off, discard the skins and top bits. Slice, dice or leave the cooked beets whole if they are small, serve and enjoy. This sweet vegetable tastes wonderful garnished with a sliver of plain or herb butter.

Beets can be prepared ahead and stored in the fridge until just before serving time, reheat over low heat with a couple of tablespoons of water and a bit of butter or grapeseed oil in a heavy bottomed pot or in the microwave.

What’s the right spices to use with beets? To perk up and ehance the flavor of your beets try a pinch of allspice, a sprinkle of black pepper or cinnamon, some caraway seeds, chives, dill, ginger, horseradish or parsley. To make pickled beets you’ll need pickling spices. I recommend that you use the best pure spices and herbs or organic herbs and spices.

New To Cooking? Try These Quick Tips!

new cooks Are you new to cooking or need some help? I’ve been cooking for years so am fairly experienced with it and thought I’d give you some quick tips:

  • Taste as you cook, after all taste is what good food is all about! Taste and add more seasonings as you go, remember you can always add more but if you add too much there’s not much you can do about it.
  • Do not use high! High heat is for boiling water, use medium to medium high heat for frying, or sauteing to avoid burning your food. You do not need to preheat your pan on high either.
  • Gather all your ingredients before you start cooking, then as you use them put any remaining away. This will ensure you don’t forget anything or add it twice!
  • Don’t be afraid to be creative, if you are out of an ingredient the recipe may taste fine with out it or if there is a spice you love, feel free to add more!
  • Try to clean as you go, this will prevent you from having to face a big mess with piles of dishes, pots and pans to clean up after your lovely meal.

I hope these five tips help you with your cooking adventures.